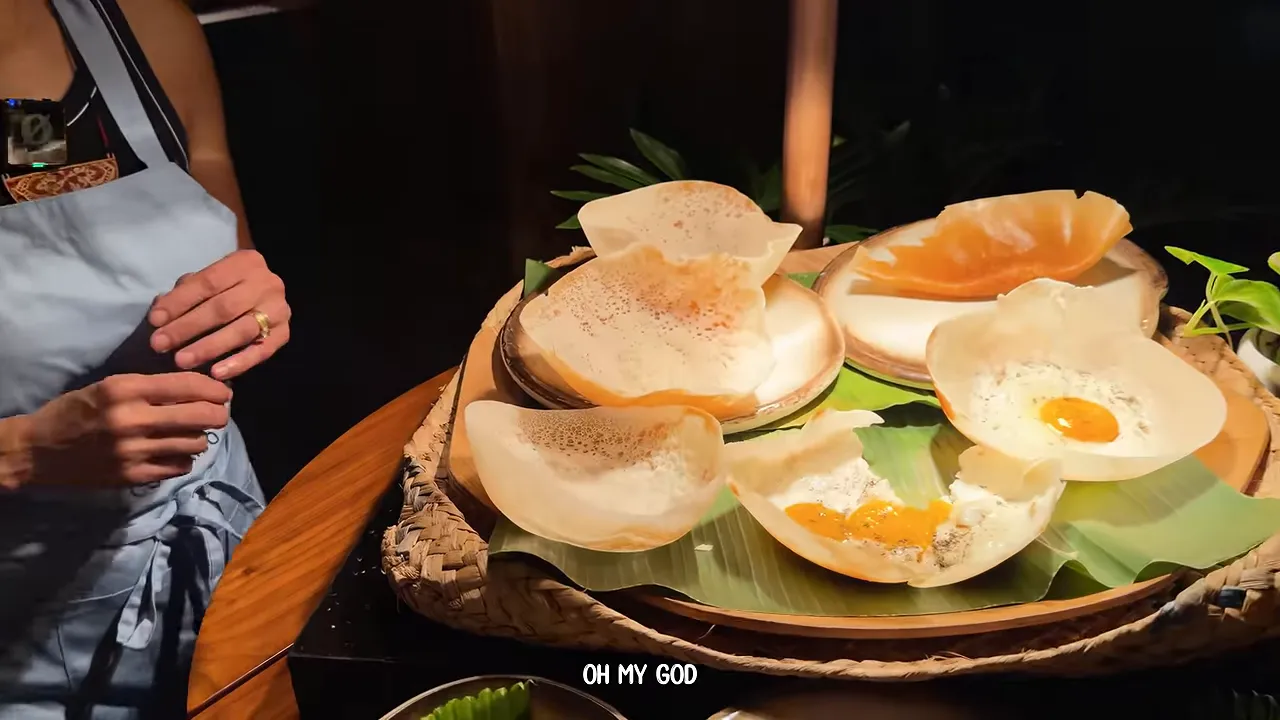
A lovely Sri Lankan hopper has those delicate, crisp sides and a softer centre, ready for an egg, a spoonful of curry or something wonderfully sweet. I had eaten hoppers in Sri Lankan restaurants in London, but making one myself? Not once.
That changed in Colombo, where I joined head chef Jude at Tiki Bar at Shangri-La for a proper hopper-making lesson. I was so excited to finally get on the other side of the pan.
The biggest lesson was that good hoppers need more than good batter. A properly seasoned pan, the right heat and a quick swirl make all the difference. It is a skill, absolutely, but even my first attempt was something I was very happy to eat.
One Basic Batter, Four Delicious Hoppers
We began with a plain hopper batter, then used it as the starting point for savoury and sweet variations. That is what I loved about the lesson: once you understand the basic technique, there is so much you can do with it.
- Plain hoppers: the basic batter cooked into a delicate bowl, perfect for curry and sambols.
- Egg hoppers: a whole egg cracked into the centre before covering the pan.
- Jaggery hoppers: a sweet variation with jaggery in the batter and extra added inside.
- Coconut milk and sugar hoppers: a plain hopper enriched with thick coconut milk and a little sugar.
The Rice and Coconut Milk Hopper Batter
Chef Jude’s method starts with rice flour, but not simply a bag of dry flour tipped into a bowl. He explained that the raw rice is soaked for at least 12 hours, drained and ground while it still retains moisture. It is not dried completely before grinding.
The resulting rice flour had a beautiful, quite pronounced rice aroma. Feeling it in the bowl made that distinction much clearer: this was a damp, freshly prepared ingredient.
What goes into the basic mix?
For the batch we prepared, the ingredients were:
- 500 g rice flour prepared from soaked, drained rice
- 1 whole egg
- Salt
- About 2½ tablespoons sugar
- Sodium bicarbonate, also called bicarbonate of soda
- Coconut milk, added gradually
This is a guide to the method rather than a fully measured recipe. The quantities of salt, bicarbonate of soda and coconut milk were not specified, so I would not want to invent those measurements or pretend that ordinary dry rice flour will behave exactly like the rice preparation used here.
Mix gradually, then allow time to rest
We worked the whole egg into the rice flour, followed by the salt and sugar. Coconut milk went in gradually as I mixed by hand, bringing the mixture from damp flour into a smooth, flowing batter.
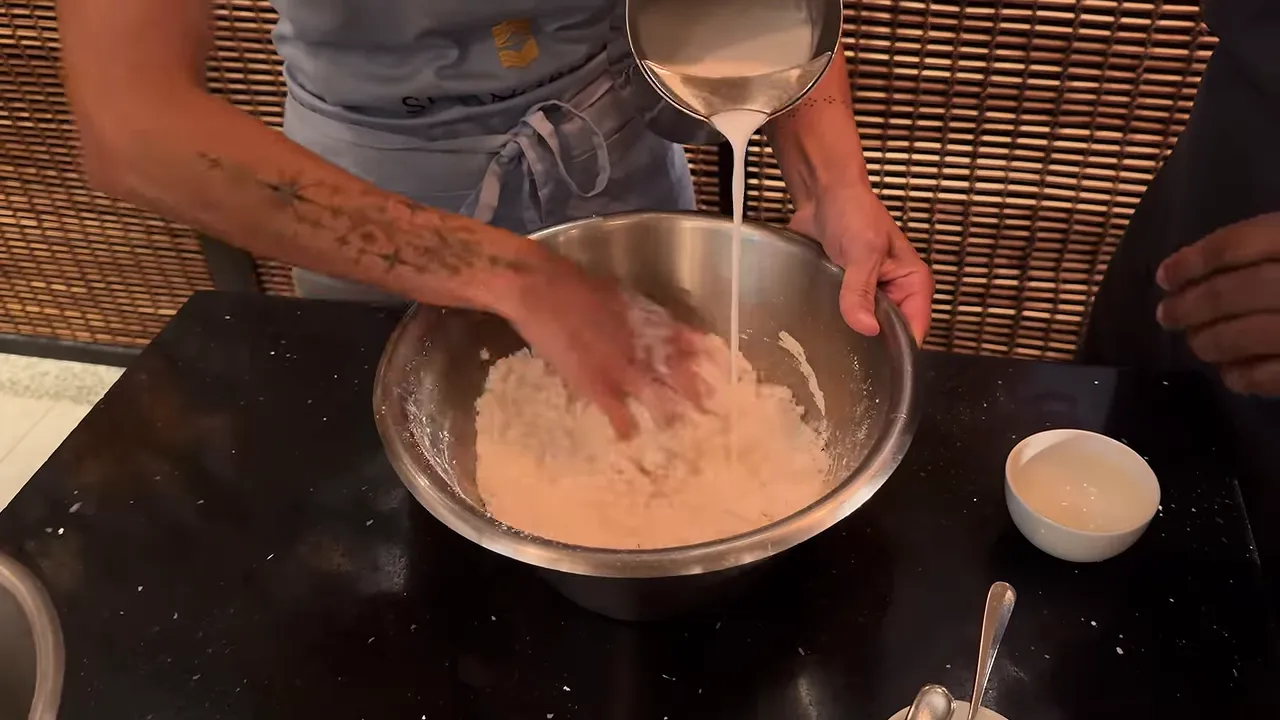
Adding the coconut milk a little at a time gives you control. The finished batter needs to flow from a ladle and spread around the curved pan rather than sit in a thick mound.
Chef Jude rests his batter for 6 to 8 hours before cooking. That means this is something to plan ahead, not mix just before you want to eat. Because the mixture contains raw egg and coconut milk, the resting time should not be taken as an instruction to leave it unrefrigerated overnight; safe temperature control matters in a home kitchen.
When he lifted the rested batter with a ladle, it fell back into the container in a continuous stream. That flowing consistency is a useful visual reference before moving to the stove.
Season the Hopper Pan Properly
The small, curved hopper pan gives the batter its bowl shape. But the shape of the pan is only part of it. Chef Jude was very clear: the pan needs to be properly seasoned, otherwise the hopper can cling to it and become difficult to remove.
He described two seasoning methods used in the kitchen:
- Sesame oil and salt: heat 2 tablespoons sesame oil with 1 tablespoon table salt, then rub the inside thoroughly with a cloth or a bunch of kitchen paper until the surface becomes shiny.
- Oil and egg yolks: fry 2 egg yolks in about 2 tablespoons vegetable oil, then rub the surface with a cloth or kitchen paper.
These were his methods for the metal pans in use. Follow the care instructions for your own pan, particularly if it has a coating. And please take care with hot oil and hot metal: keep your hands protected and away from the heated surface.
The Real Secret: Heat and a Quick Swirl
I thought the swirling would be the easy bit. It looks so effortless when someone experienced does it. Then I picked up the pan!
My first attempt did not spread quickly enough, and the coating was too thick. It was still recognisably a hopper, which felt like a very good start, but the next attempt taught me just how much speed matters.
How to shape and cook a plain hopper
- Heat the seasoned pan. Getting the temperature right is essential before adding the batter.
- Lift the pan by its handle and add a ladleful of batter. Chef Jude pointed out the sizzling sound as a sign that the pan was ready.
- Immediately tilt and rotate the pan. Work quickly so the batter coats the curved sides in a thin layer, leaving a little more in the bottom.
- Return the pan to the heat and cover. Let the hopper cook until the centre is set and the sides hold their shape.
- Gently loosen and lift it out. We used a spoon to ease the edge away before transferring it to a plate.
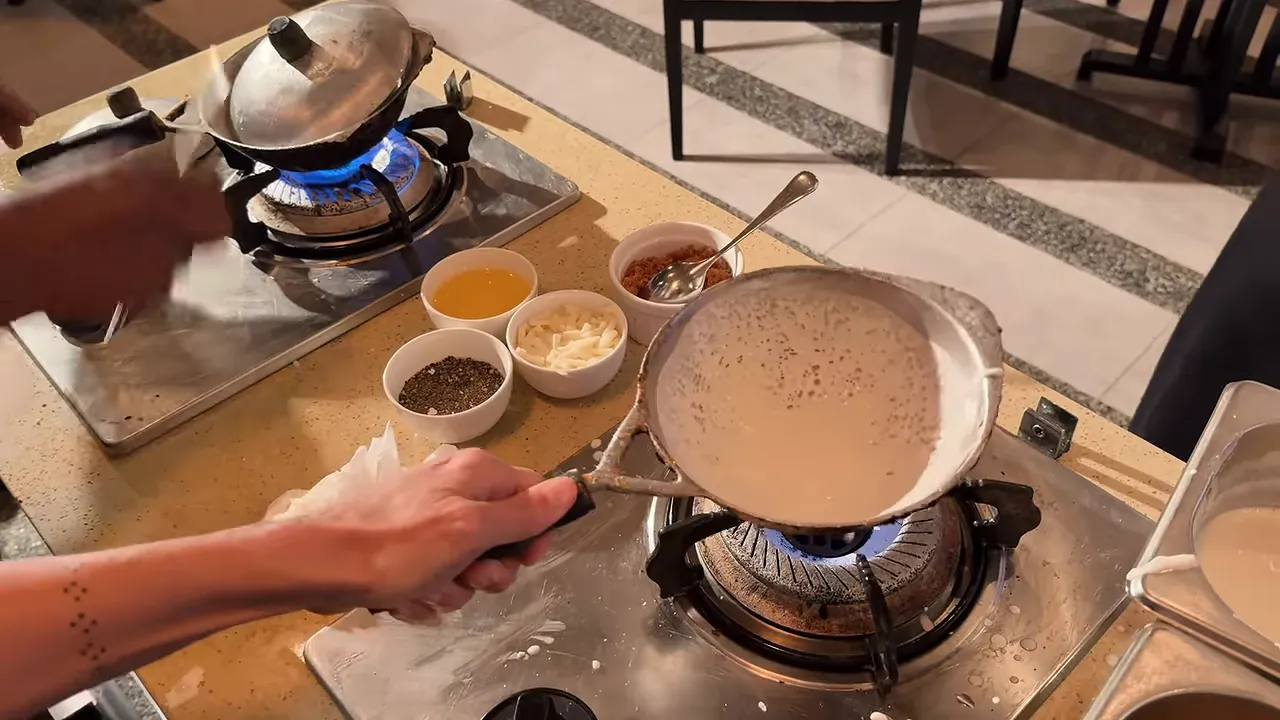
There is an important balance here. The batter needs to catch on the sides long enough to form that thin shell, then release once cooked. Chef Jude explained that an overheated pan can stop the batter adhering properly. Turning the flame up as high as possible is not the answer.
The chefs could judge the heat with years of experience. Please do not copy the close-to-the-face heat check demonstrated in the kitchen. Concentrate on the batter’s behaviour and the sound as it hits the pan, without bringing your skin near hot cookware.
By my second go, the swirl worked. The batter climbed the sides, the centre settled, and I could finally crack in an egg. Such a satisfying moment.
How to Make an Egg Hopper
An egg hopper starts exactly like a plain one. Add the batter and swirl it around the hot pan, then crack a whole egg into the centre and put the lid on.
The egg cooks inside the hopper while the thin outer shell sets. Once it is ready, gently loosen the edges and lift the whole thing out, keeping that lovely bowl shape intact.
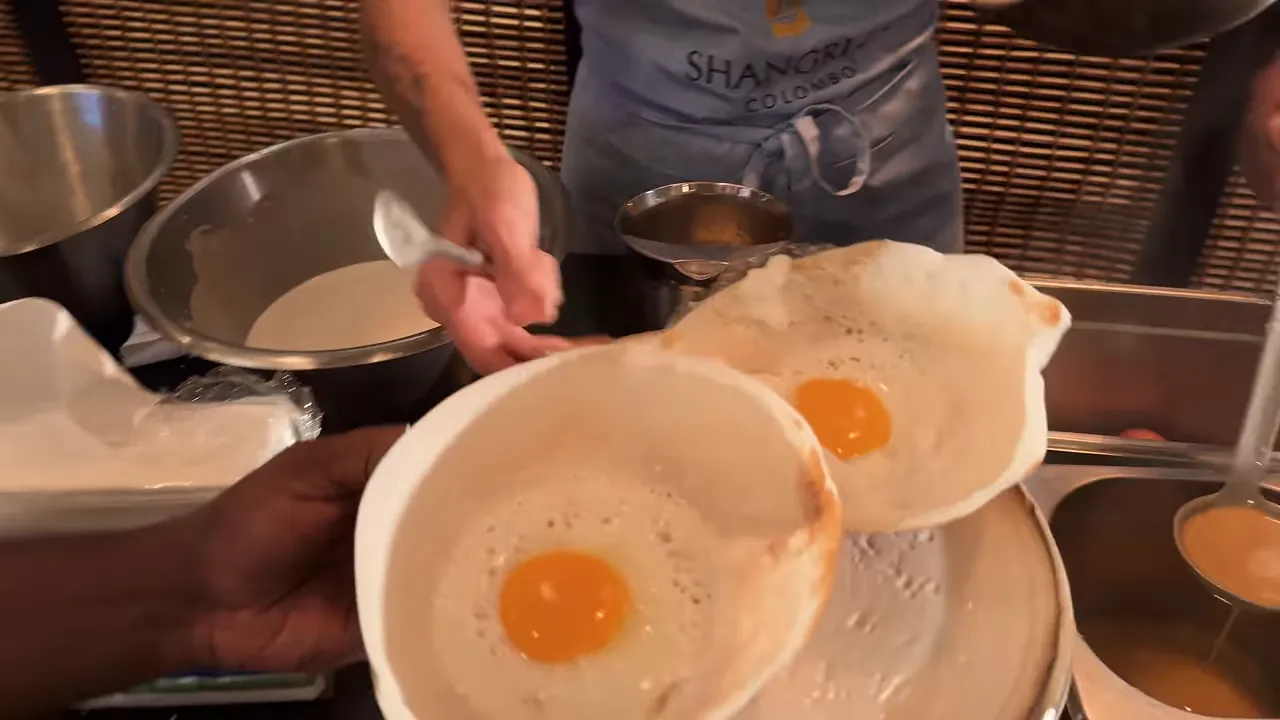
I finished mine with pepper, although Chef Jude quickly reminded me that only a very little was needed. The egg hopper is delicious on its own, but with chicken curry and a little onion sambol, it becomes something quite special.
Sweet Hoppers with Jaggery or Coconut Cream
The sweet hoppers were the real surprise for me. I was excited about the jaggery one before tasting it, but I had no idea how much I would love the coconut version.
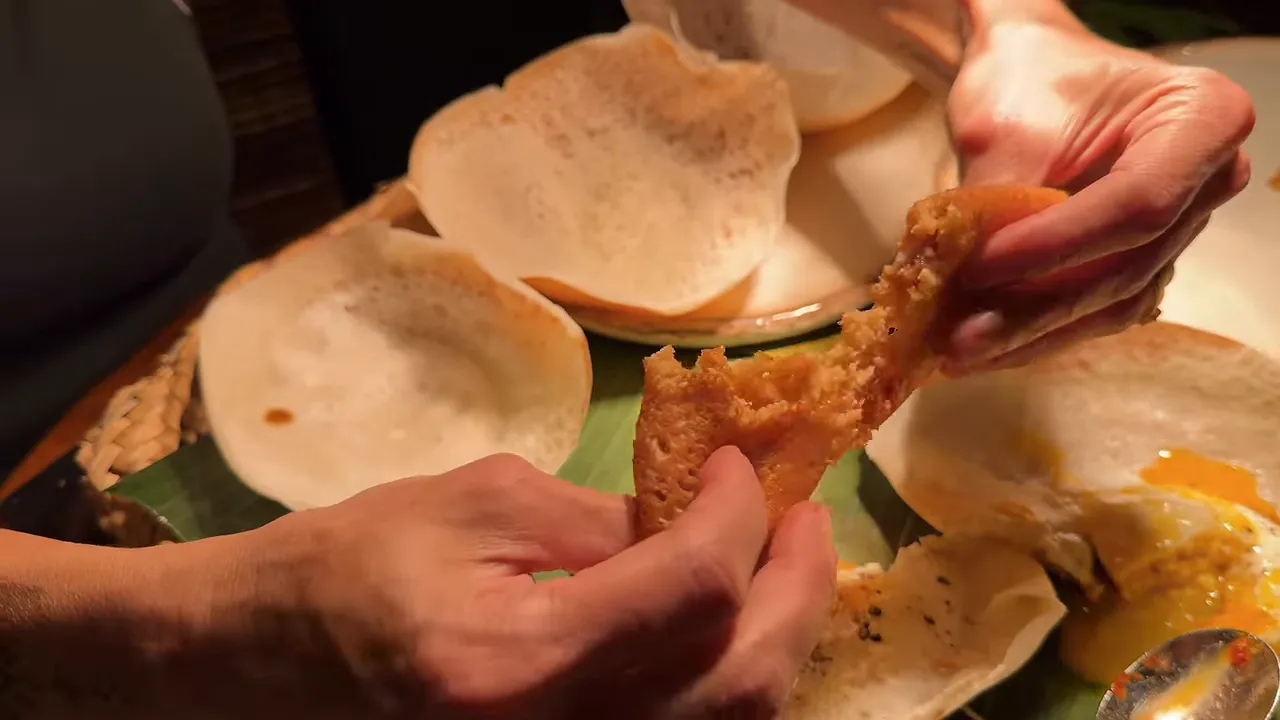
Jaggery hoppers
For the jaggery hopper, the batter was sweetened with jaggery and swirled around the pan in the same way. More jaggery could be added inside before putting the lid on.
The cooked hopper had a beautiful golden-brown colour and was folded over to serve. It is very much a dessert, and absolutely delicious. Tearing off a piece revealed that lovely sweet centre.
Coconut milk and sugar hoppers
For this variation, Chef Jude explained that freshly made coconut milk is chilled for about 3 hours, allowing the thicker coconut-rich layer to separate from the watery part. The thick layer is then scooped off to use in the hopper.
After swirling the plain batter, the chef poured some of that thick coconut milk into the centre and covered the pan. A little sugar completed it.
It sounds so simple: coconut cream, a little sugar and a hopper. But honestly, it was magical. This became my favourite, especially with a little of the jaggery hopper alongside it.
What to Serve with Sri Lankan Hoppers
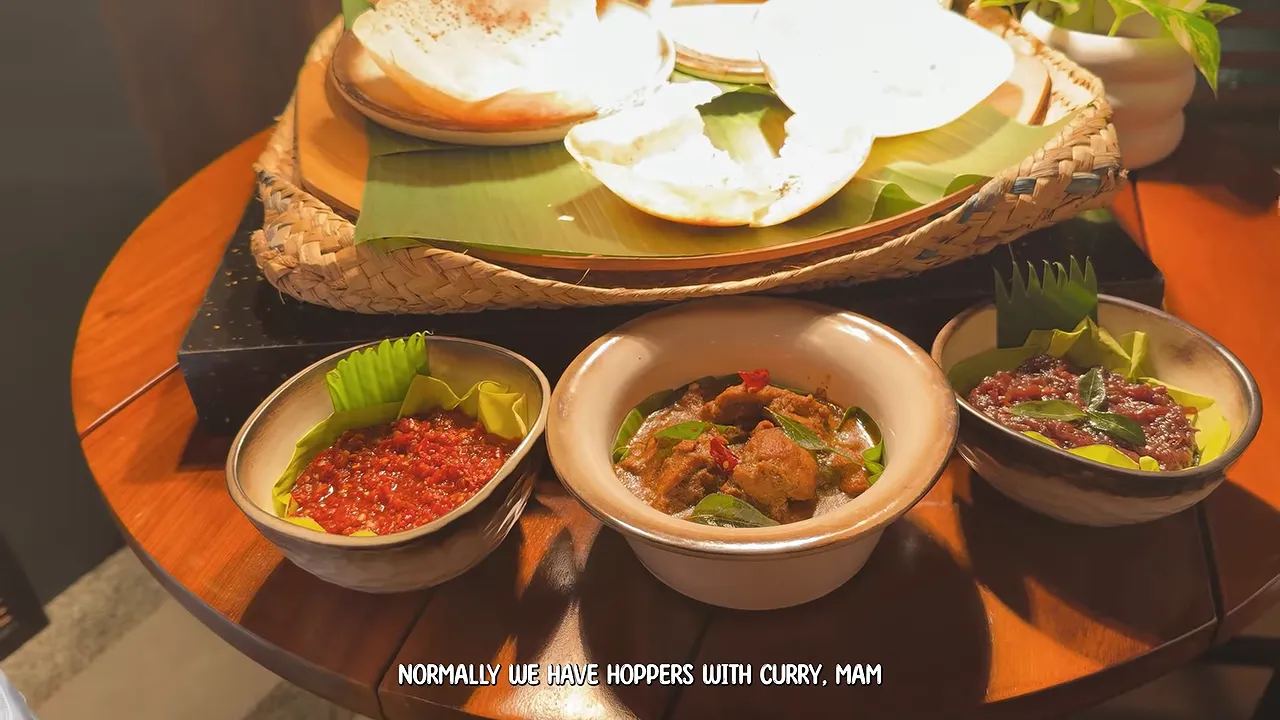
Our savoury hoppers came with chicken curry and two very different onion accompaniments. Do not overlook these. The contrast between the crisp hopper, rich curry and punchy sambols is wonderful.
Lunu miris
The lunu miris served here was made with onion, chilli and tomato, seasoned with salt. It brought a lively chilli kick to the egg hopper and curry.
Seeni sambol
The dark onion accompaniment was seeni sambol, a Sri Lankan caramelised onion sambol. This version brought together onions, tamarind, chilli, spices, curry leaves and cinnamon.
One small but important clarification from the chef: curry leaves, not curry powder. It was a beautiful combination, and one of my favourite things on the table.
Chef Jude’s Chicken Curry Method
The chicken curry was so good that I had to ask how it was made. Chef Jude gave me the outline of his method, and what struck me was that there was no blended curry paste. The sauce came together from the onions, aromatics, tomatoes and spices in the pot.
He explained that different chicken cuts can be used; the kitchen used boneless chicken thighs for the curry we ate.
- Marinate the chicken. Season with salt, pepper, chilli powder and unroasted curry powder. Leave to marinate for about 1½ hours, keeping the chicken refrigerated.
- Prepare the aromatic base. Heat a little oil and fry onion, garlic and green chilli.
- Add the spices. Use unroasted curry powder, chilli powder, cinnamon, two or three cloves and cardamom. Sauté well.
- Add a modest amount of tomato. Chef Jude emphasised that the tomato should not dominate.
- Add the chicken and a little water. Cook the curry until the chicken is fully cooked through.
This is the chef’s broad approach rather than a measured curry recipe. He particularly highlighted cinnamon as an ingredient he uses frequently in Sri Lankan curries. In this dish, the spices made a delicious sauce without needing to grind everything into a paste.
Do Not Expect Your First Hopper to Be Perfect
My first hopper was thicker than it should have been. My next one was much better. That is probably the most useful encouragement I can give.
Prepare the batter ahead, season the pan properly, pay attention to the heat and swirl quickly. Those are the details that turn a ladleful of batter into a lovely hopper.
And do try the sweet variations, not just the egg hopper. The coconut and jaggery were a complete revelation for me. I left that kitchen determined to try again at home, whether the first batch turned out beautifully or needed a little more practice.


