A proper filled doughnut should be light, fluffy and absolutely packed with cream. Not heavy, not stodgy, and certainly not with just a tiny bit of filling hiding in the middle. These homemade doughnuts have a lovely golden outside, a coating of caster sugar and the most gorgeous vanilla custard cream inside.
The basic dough comes from my book, The Cardamom Trail, where I fill the doughnuts with coconut and cardamom cream. Here, I am using a light vanilla custard cream instead. It is such a delicious treat, and a few little details make all the difference: giving the dough enough time to prove, handling it gently and keeping the frying oil from getting too hot.
Makes: 24 slightly smaller doughnuts, or about 20 larger doughnuts.
Proving time: About 2 hours for the first rise, then about 1 hour after shaping.
Frying time: About 1½ to 2 minutes on each side, in batches.
Also allow time for: Making and chilling the custard, shaping, frying and cooling before filling.
Ingredients and Equipment
For the dough
- 500 g strong white bread flour, plus extra for the work surface and trays
- 10 g salt
- 10 g dried fast-action yeast
- 60 g caster sugar
- 4 large eggs
- 125 ml water
- 125 g softened butter, plus a little extra butter or plain oil for greasing the bowl
For frying and coating
- Sunflower oil, for frying
- Caster sugar, for rolling the warm doughnuts
For the vanilla custard cream
- 600 ml double cream
- 2 tablespoons caster sugar
- Thick homemade vanilla custard, completely chilled
- Roasted, chopped hazelnuts, optional, to finish
For the custard component, use my separate homemade custard recipe for the ingredients, quantities and cooking method. Prepare it in time to cool completely before combining it with the cream.
A stand mixer fitted with a dough hook makes the dough easier to manage, but you can knead it by hand. You will also need several trays, a cooking thermometer, a slotted spoon, kitchen paper, and a piping bag fitted with a plain round nozzle. A dough scraper is very useful for dividing the dough and lifting the proved doughnuts.
Make the Enriched Dough
- Combine the dry ingredients. Put the bread flour, salt, yeast and caster sugar into the mixer bowl and mix together.
- Add the eggs and water. Add the four eggs. Start mixing with the dough hook, then gradually pour in the 125 ml water.
- Knead for 8 minutes. Once all the water is incorporated, continue mixing for about 8 minutes. The dough should become very stretchy.
- Add the softened butter gradually. Keep the mixer running and add the butter a little at a time. Continue mixing for about 5 minutes, until the butter is fully incorporated and the dough is beautifully elastic.
- Leave for the first rise. Lightly grease a large bowl with butter or plain oil. Transfer the dough to the bowl, cover and leave in a warm place for about 2 hours, until well risen.
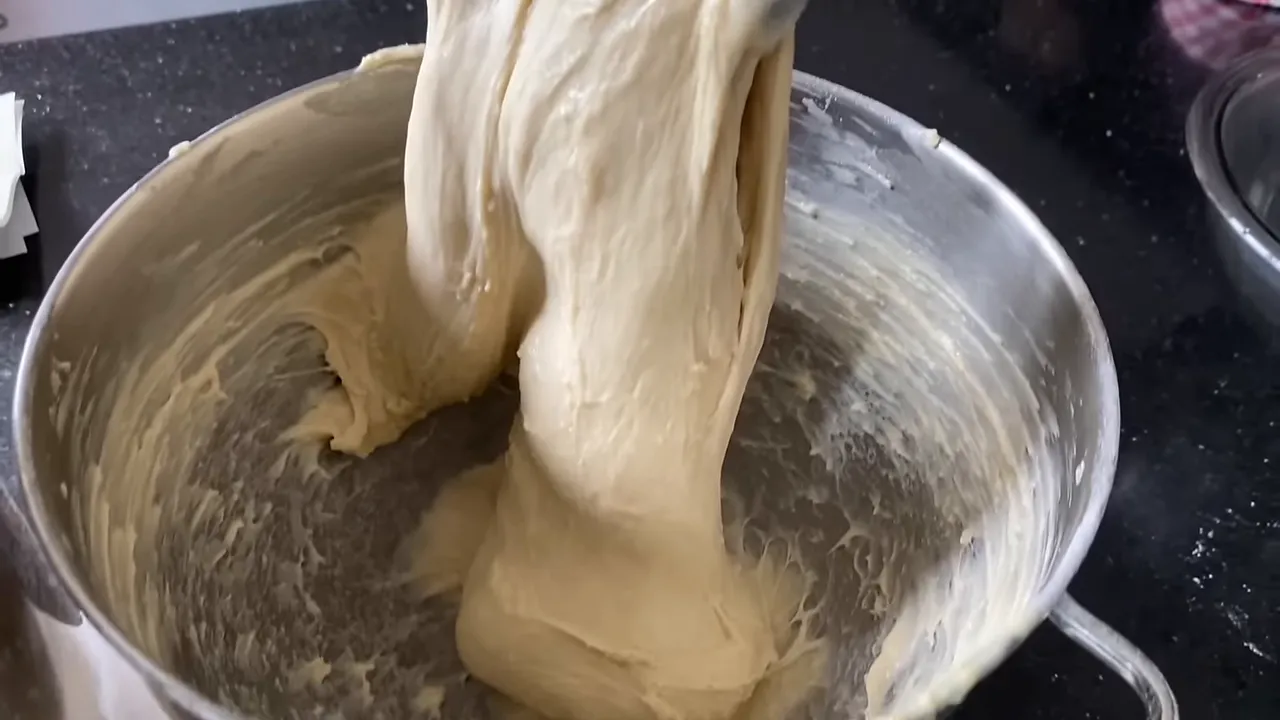
If you are kneading by hand, do not worry that the dough is sticky. This is a rich dough with eggs and butter, so it takes a little patience. The mixer makes the work easier, but it is not essential.
Shape the Doughnuts and Prove Again
Flour your work surface and turn out the risen dough. Press and fold it to knock out the air, then divide it into roughly equal portions.
I like to make 24 doughnuts, slightly smaller than the large ones you often find in shops. Divide the dough in half, then divide each half into 12 pieces. If you prefer larger doughnuts, make about 20 instead. You can weigh the portions for accuracy, but I am quite happy to divide them by eye.
- Shape each piece. Bring the edges into the centre, then roll against the work surface to tighten it into a smooth, neat ball.
- Arrange on floured trays. Make sure there is enough flour underneath each ball so it will lift off easily later. Leave space between them to rise.
- Cover without sticking. Use lightly oiled cling film, with the oiled side facing the dough. Alternatively, slide the trays into large food-safe plastic bags.
- Prove for about 1 hour. Leave until the doughnuts have doubled in size.
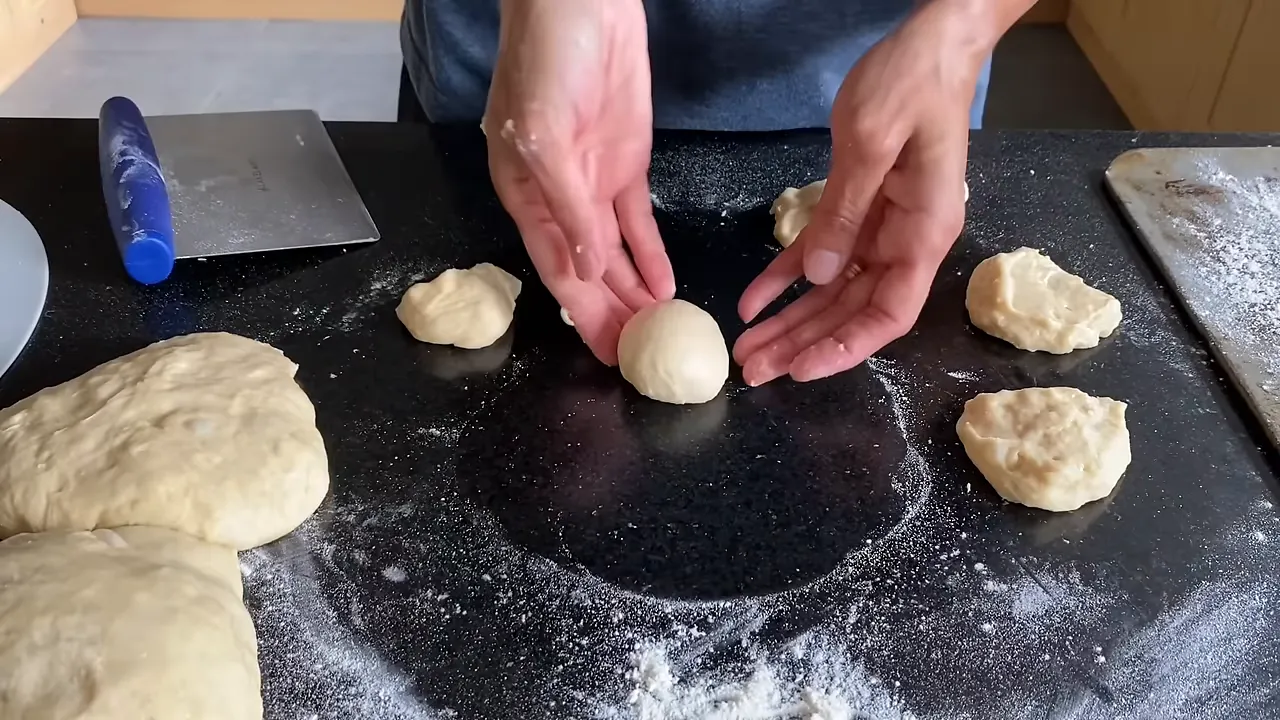
My biggest proving tip: keep the trays in the order you shaped them. The first doughnuts you shape will already be rising while you finish the rest. Fry that first tray first, then work through the others in order. This helps each batch receive a similar amount of proving time.
Make and chill the custard during the second rise
While the shaped doughnuts are proving, make the vanilla custard if you have not prepared it already. It needs to be lovely and thick.
Transfer it to a bowl and place cling film directly against the surface of the custard, rather than simply stretching it across the top of the bowl. This prevents a thick skin from forming. Chill in the fridge until completely cold. If it is not cold by the time the doughnuts are ready, give it longer.
Fry Gently for Golden Doughnuts with Fluffy Centres
I use sunflower oil because it has a neutral flavour. Heat it to around 150°C to 160°C, checking with a thermometer.
Some recipes use 180°C, but I prefer the lower temperature for these doughnuts. Very hot oil can turn the outside golden in seconds while leaving raw dough in the middle. You want to give the centres time to cook through, not just colour the outside.
- Get everything ready. Put caster sugar in a bowl and line a plate with kitchen paper.
- Lift the doughnuts gently. Start with the first tray you shaped. Use a lightly floured dough scraper to release each doughnut, taking care not to squash or deflate it.
- Lower carefully into the oil. Fry in small batches, with room to turn the doughnuts.
- Cook on both sides. Fry for about 1½ to 2 minutes per side, turning carefully with a slotted spoon, until golden and cooked through.
- Drain briefly. Lift out onto the kitchen paper, then continue with the remaining batches in shaping order.
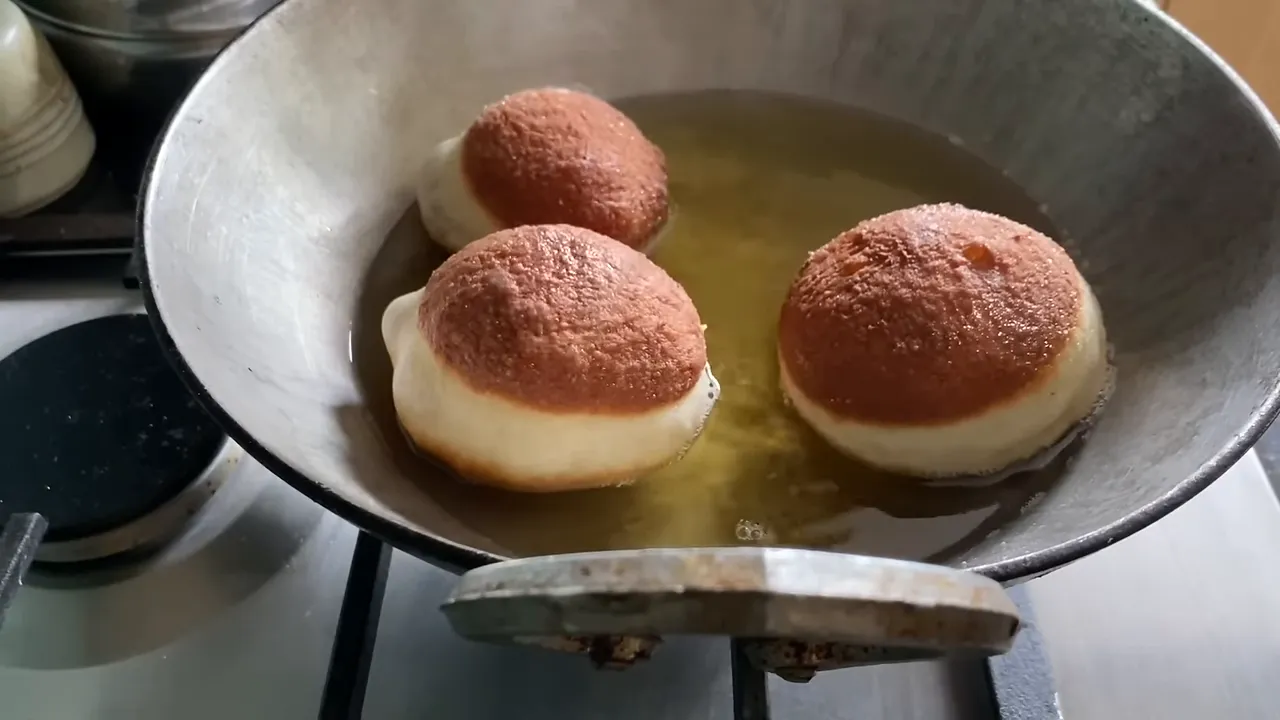
Be especially gentle between the tray and the oil. You have spent all that time creating a light, airy dough, so you do not want to press the air out just before frying.
Roll in sugar while warm
After draining briefly, roll each doughnut in caster sugar while it is still warm. Turn it over and around so the sugar coats it properly. Do not leave the whole batch to cool before doing this.
The doughnuts should feel wonderfully light. That airy feeling, along with the little pale rim around the middle, is a very good sign.
Now comes the difficult part: waiting. Let the sugared doughnuts cool completely before adding the custard cream.
Whisk the Vanilla Custard Cream
Put the double cream and 2 tablespoons of caster sugar into a large bowl. Whisk until it begins to thicken towards soft peaks, but stop while it is still slightly loose.
Add the completely chilled vanilla custard, then finish whisking the two together until the filling is smooth, thick and holds its shape well enough to pipe.
Do not fully whip the cream before adding the custard. You still need to whisk the mixture together, and leaving all that mixing until the end makes it easier to overwhip the cream. Adding the custard before the final whisk gives you much more control.
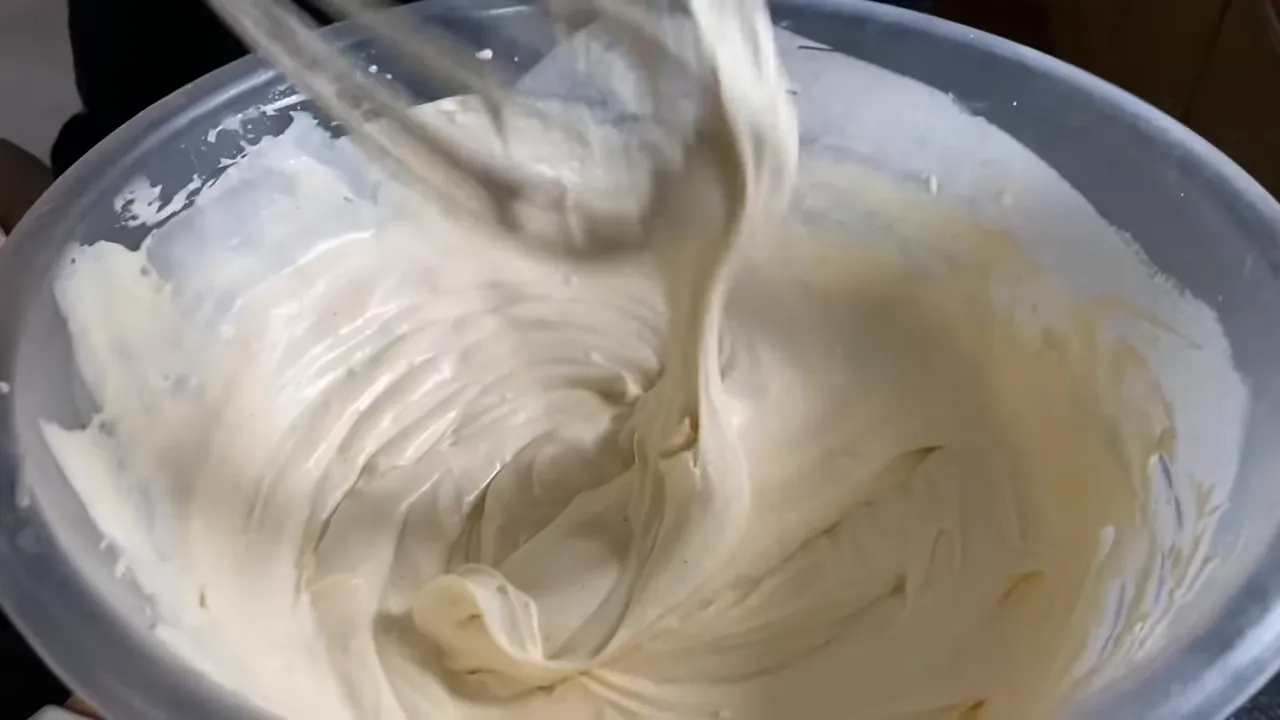
Spoon the filling into a piping bag fitted with a plain round nozzle. The vanilla smells absolutely gorgeous at this stage. It is very tempting to keep tasting it!
Fill Generously and Finish
A little preparation makes a big difference here. Simply pushing a nozzle into the side does not create much space, and you want the cream to reach the centre.
- Make an opening. Insert a small sharp knife into one side of a cooled doughnut, reaching about halfway through to the centre.
- Create room for the cream. Gently move the knife inside to make a cavity, without cutting through the other side. Repeat with the remaining doughnuts.
- Pipe in the filling. Insert the nozzle into the opening and squeeze in the custard cream generously.
- Finish with a little swirl. Leave a small peak of cream at the opening. If you like, stand the doughnuts upright with the cream facing upwards.
- Add hazelnuts if you wish. Sprinkle roasted, chopped hazelnuts over the exposed cream. I like to finish half with nuts and leave half plain.
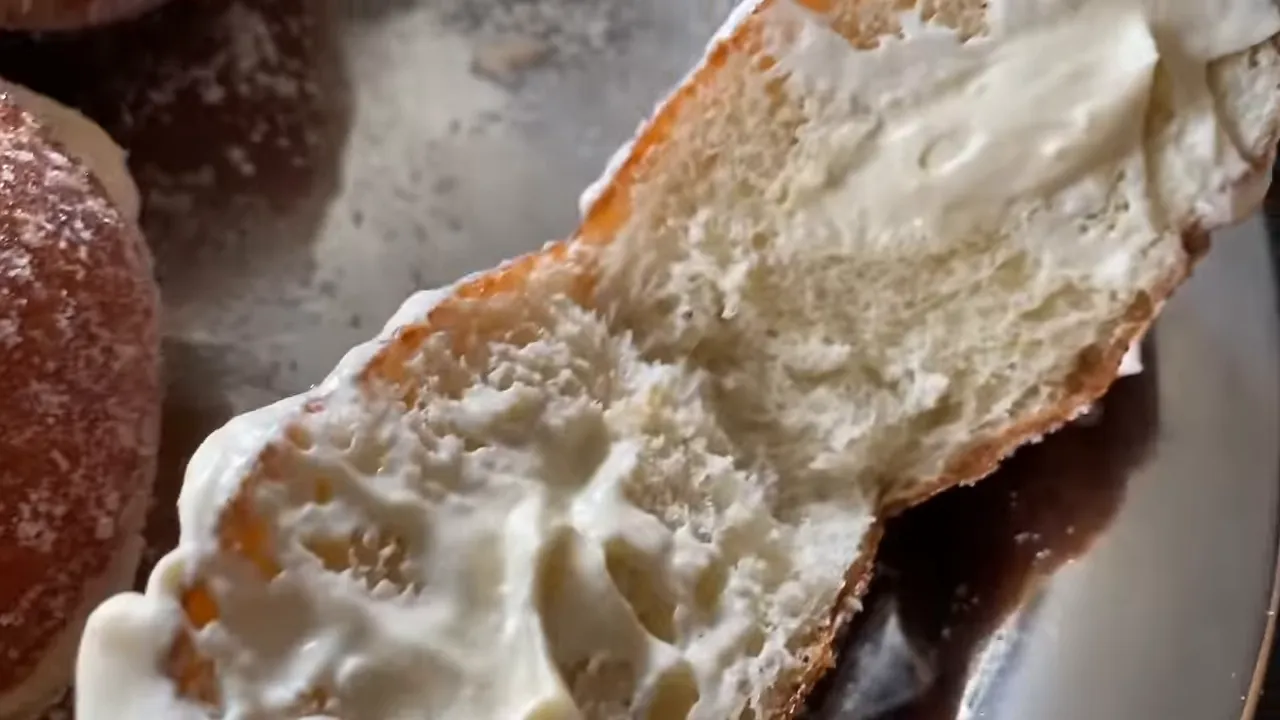
You can also enjoy these doughnuts simply rolled in sugar, or fill them with jam, chocolate ganache or chocolate sauce. But this vanilla custard cream is such a lovely combination: soft, airy dough, a little crunch from the sugar and that beautiful creamy centre.
Arrange them on a serving tray for everyone to enjoy. Once you cut into one and see that fluffy middle filled with cream, the patience is absolutely worth it.


